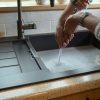
How to Use a Plunger Like a Pro: The Ultimate Drain-Clearing Guide

We’ve all been there: you flush the toilet or drain the sink, and instead of the water disappearing, it starts to rise. Panic sets in, and you reach for the most trusted tool in your utility closet. But do you actually know how to use a plunger correctly?
While it seems simple, there is a specific technique to plunging that makes the difference between a quick fix and a messy disaster. At Robillard Plumbing, we want to help you handle the small stuff safely. Here is your master class in effective plunging.
Step 1: Choose the Right Plunger
Believe it or not, different plungers are designed for different tasks. Using the wrong one is the most common reason homeowners fail to clear a clog.
- The Cup Plunger: This is the classic “red rubber” plunger with a flat bottom. It is designed for flat surfaces, like sinks, bathtubs, and showers. It does not work well on toilets because it cannot create a proper seal.
- The Flange (Toilet) Plunger: This plunger has a fold-out rubber flap (the flange) at the bottom. This flap is designed to fit perfectly into the curved drain of a toilet bowl to create a powerful vacuum.
Step 2: Prepare the Area
Before you start, make sure you aren’t about to make a mess.
- Check the Water Level: For a plunger to work, the rubber cup needs to be submerged in water. If the sink or toilet is empty, add enough water to cover the plunger head. If it’s overflowing, bail some out into a bucket.
- Protect the Floor: Lay down some towels or newspaper around the base of the fixture to catch any splashes.
Step 3: Create the Seal
This is the most important part of learning how to use a plunger.
- Place the plunger into the drain at an angle to allow air to escape from the cup (trapping air inside compresses it, which weakens the pressure).
- Press down firmly but slowly to ensure the rubber is sealed tight against the drain opening. If you’re plunging a sink, use a wet rag to plug the “overflow” hole—otherwise, the air pressure will just escape out of that hole instead of pushing against the clog.
Step 4: The Plunging Motion
Many people think the “push” is what clears the clog, but it’s actually the pull.
- Push down to get the air out, then pull up sharply.
- Maintain the seal and continue a vigorous “push-and-pull” rhythm for about 15 to 20 seconds.
- The goal is to move the water back and forth, which loosens the obstruction until it breaks apart or moves down the line.
Step 5: Test the Result
After several cycles of plunging, pull the plunger away. If the water rushes down the drain, you’ve succeeded! If you’re clearing a toilet, give it one more flush to ensure everything is moving freely.
When the Plunger Isn’t Enough
If you’ve tried the steps above three or four times and the water still won’t budge, you likely have a more serious issue than a simple surface clog.
Stop plunging if:
- Water is backing up into other fixtures (like the shower when you flush).
- The water has a foul, sewage-like odor.
- You’ve used chemical drain cleaners (plunging can splash these dangerous chemicals onto your skin or eyes).
In these cases, you might be dealing with a main line blockage or a stubborn object that requires a professional drain snake.
Don’t let a stubborn drain ruin your day! If your DIY efforts aren’t working, contact the experts at Robillard Plumbing at (763) 424-5514. We have the professional tools to clear any clog, guaranteed.


